Monday, 25 April 2016

Blog - Week 7 (Project 2)

1. Draw a series of 3 parallel projections exploring the interconnection between pairs of your drawings from week one (make sure that each one of the pair represents a different concept). 

Recall: the EXP2 brief states "Use one of these concepts to create a light rail stop ... and ... the second concept to help situate the light rail stop within its urban context.." So it might help to think about one parallel projection being the Light Rail Stop and the other the urban environment...

Interconnection drawing 1, concept being simplicity

Interconnection drawing 2, concept being ever growing and further developing

Interconnection drawing 3, concept being unfolding and adapting

2. Draw the same set of 3 parallel projections from the opposite angle.
Interconnection drawing 1, concept being simplicity (view 2)

Interconnection drawing 2, concept being ever growing and further developing (view 2)

Interconnection drawing 3, concept being unfolding and adapting (view 2)

3. In the second set of 3 parallel projections, from step 2, imagine one of the two blocks is a structure that you use to form a 3d curving surface around (as if you were going to "subdivide and smooth" it using the Artisan Tools in SketchUp). Draw curving lines over the geometry to indicate its new form. On the geometry that remains rectilinear use carefully hatched lines to highlight one set of surfaces that exist in parallel planes. The end result is one rectilinear form interacting with one curvilinear form.

SketchUp image of parallel projection

SketchUp image of parallel projection

Note: throughout the class students will be exporting objects from SketchUp to Lumion.

4. In consultation with your tutor take one drawing created in class and use it to develop your Light Rail Stop in Lumion.

5. Use 'Fraps', or similar, to capture two images from your Lumion environment and upload them, along with the page from your sketchbook that you based it on, to your blog.

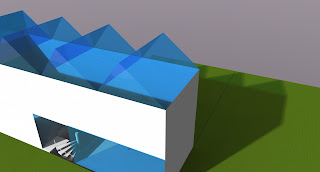
Lumion image 1 of my set of parallel projections

Lumion image 1 of my set of parallel projections

6. Rewrite the concepts relating to your chosen axonometric (step 1 above) so that the new piece of writing forms an "Electroliquid Aggregation". Recall the definition of an Electroliquid Aggregation from the lecture: “Why still speak of the real and the virtual, the material and immaterial? Here these categories are not in opposition, or in some metaphysical disagreement, but more in an electroliquid aggregation, enforcing each other, as in a two part adhesive.” Lars Spuybroek, [1998] Motor Geometry, Architectural Design, Vol 68 No 5/6, p5

Note: make sure you save the Lumion environment as you go along as it will be a part of your EXP2 submission. To back up your Lumion work you will find the files in your "My Documents" folder; for ARCH1101 you'll need to save the Library and Scenes folders in particular.

The chosen concepts I am now focusing on simplicity, explored by Chris Alexander, and also ever growing and further developing explored by Eladio Dieste. 

Tuesday, 19 April 2016

Blog - Week 6 (Project 2)

1. As a class group conduct some online research into the two Architects chosen by your tutor. The aim of this research is to collate 5 concepts (about one sentence each) relating to each of the 2 Architects. Your tutor will record the concepts on your class blog for your future reference. Take about an hour to do this step.


C. Alexander Concepts:
Emotion with pattern
- Comfort clients through architectural design
Explore and respect history in simplicity
Unfolding and adapting
-Universal comforting design
Imparting cultural memories
Contradiction between internal and external

E. Dieste Concepts:
Every growing and further developing
Form overlaps other
Movement is transformative
Every curve ends 
Space has a role


2. Divide the pages of your notebook in half. If using an iPhone like device use a full screen.

3. On the top part of each page draw a series of 6 axonometrics exploring the amalgamation of 5 rectangular prisms. Each amalgamation should reflect a concept from step 1.

The rectangular prisms should intersect with each other at right angles. Use carefully hatched lines to highlight one set of surfaces that exist in parallel planes. Some of the rectangular prisms might be 'subtracted' from the others; you do not need to use the same set of 5 rectangular prisms for your 6 drawings.

4. On the lower part of each page draw a second series of 6 axonometrics that re-draw the first series from the opposite point of view. Use carefully hatched lines to highlight one set of surfaces that exist in parallel planes.
Axonometric drawing 1

Axonometric drawing 2

Axonometric drawing 3

Axonometric drawing 4

Axonometric drawing 5

Axonometric drawing 6

Axonometric drawing 7

5. In consultation with your tutor take one pair of axonometrics created in class and construct them in 3 dimensions using SketchUp.

6. Follow the tutorial below to export your SketchUp model into Lumion.

7. Download 'Fraps' to capture two images from your Lumion environment and upload them, along with the page from your sketchbook that you based it on, to your blog.

Original axonometrical drawing idea, uses concept of form over lapping

Lumion picture 1

Lumion picture 2

Lumion picture 3

Monday, 11 April 2016

Blog - Week 4 (Project 1)

1. Choose one of your two conceptual designs to take through to a high degree of resolution.

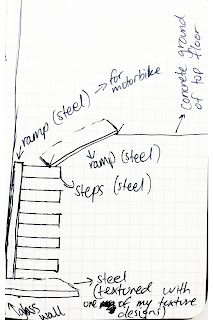
2. For the chosen design develop the design of the stair in terms of composition, materials, balustrades and structure. Pay special attention to how the stair integrates with the surrounding architecture (i.e. you'll need to draw sections showing both the stair and the building fabric it touches).

Stairs from below ground workshop to ground floor gallery

Stairs from above ground workshop to ground floor gallery

3. Reflecting on the SketchUp model and sketches in your notebook consider 3 points of view that would show the most significant and distinctive aspects of your design when cut by an animated section; discuss these with your tutor.

Section cut 1

Section cut 2

Section cut 3

4. Continue to develop your Sketchup model through to a high level of resolution. This model should include the best examples of your custom textures (remember, not all of the models geometry needs to be textured) and the scenes used to construct your animations.

Render 1

Render 2

Render 3

Render 4

Render 5

Render 6

5. Upload 3 images of your developed Sketchup model and the set of 2 dimensional section drawings from your notebooks to your blog. Include each materials name as a caption.

Image 1

Image 2

Image 3

Drawing 1 of Final Design

Drawing 2 of Final Design

6. Create 3 short (15 second max) animations based on the points of view and sections discussed above. Use the export settings shown below. Upload the 3 short (15 second max) animations to YouTube and embed them in your blog. Include "ARCH1101", "EXP1", "2016" and your "Full Name" as tags to your YouTube uploads.

Animation of Final Design 1

Animation of Final Design 2

Animation of Final Design 3

7. Upload your final Sketchup model to the 3dWarehouse. Include "ARCH1101", "EXP1", "2016" and your "Full Name" as tags to your Google Warehouse uploads. See below for a tutorial on how to do this; the appropriate section is labeled "Uploading Models". 

Tuesday, 5 April 2016

Blog - Week 3 (Project 1)

1. In groups of 5 come up with 36 words to describe the features/qualities/properties of materials. Note: throughout the class students will be demonstrating the methods for modeling and texturing objects in SketchUp. In past classes one student creates a 3d form and the next adds to it and so on; it's interesting to see a tutorial group 'summarised' in this way.

Texture 1

Texture 2

Texture 3

Texture 4

Texture 5

Texture 6

Texture 7

Texture 8

Texture 9

Texture 10

Texture 11

Texture 12

Texture 13

Texture 14

Texture 15

Texture 16

Texture 17

Texture 18

Texture 19

Texture 20

Texture 21

Texture 22

Texture 23

Texture 24

Texture 25

Texture 26

Texture 27

Texture 28

Texture 29

Texture 30

Texture 31

Texture 32

Texture 33

Texture 34

Texture 35

Texture 36

2. Include two simple shapes in your developed Sketchup model and apply an image of your clients work to them. They should be to scale and represent an approximate form and volume. (This is so we can see the relationship between the work and the space that it was constructed in).
Above ground workshop

Below ground workshop

3. Choose 3 of the textures you've developed and apply them to the most appropriate parts of the SketchUp model. IMPORTANT: you do not have to cover your entire model, use the textures to highlight certain aspects or spaces.

Texture 1

Texture 20

Texture 31

4. Upload 2 new images of your developed SketchUp model to your blog; these should show the designers work in their workshop.

Pasi Petanen workshop (below ground)

Jeff Wright workshop (above ground)

5. Find a short movie that has something to do with the section, stair, texture or materiality and your scheme. Embed the video in your blog.