1. Choose one of your two conceptual designs to take through to a high degree of resolution.
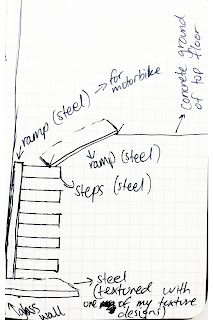
2. For the chosen design develop the design of the stair in terms of composition, materials, balustrades and structure. Pay special attention to how the stair integrates with the surrounding architecture (i.e. you'll need to draw sections showing both the stair and the building fabric it touches).
Stairs from below ground workshop to ground floor gallery
Stairs from above ground workshop to ground floor gallery
3. Reflecting on the SketchUp model and sketches in your notebook consider 3 points of view that would show the most significant and distinctive aspects of your design when cut by an animated section; discuss these with your tutor.
Section cut 1
Section cut 2
Section cut 3
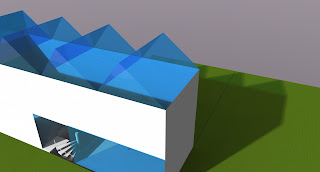
4. Continue to develop your Sketchup model through to a high level of resolution. This model should include the best examples of your custom textures (remember, not all of the models geometry needs to be textured) and the scenes used to construct your animations.
Render 1
Render 2
Render 3
Render 4
Render 5
Render 6
5. Upload 3 images of your developed Sketchup model and the set of 2 dimensional section drawings from your notebooks to your blog. Include each materials name as a caption.
Image 1
Image 2
Image 3
Drawing 1 of Final Design
Drawing 2 of Final Design
6. Create 3 short (15 second max) animations based on the points of view and sections discussed above. Use the export settings shown below. Upload the 3 short (15 second max) animations to YouTube and embed them in your blog. Include "ARCH1101", "EXP1", "2016" and your "Full Name" as tags to your YouTube uploads.
Animation of Final Design 1
Animation of Final Design 2
Animation of Final Design 3
7. Upload your final Sketchup model to the 3dWarehouse. Include "ARCH1101", "EXP1", "2016" and your "Full Name" as tags to your Google Warehouse uploads. See below for a tutorial on how to do this; the appropriate section is labeled "Uploading Models".


No comments:
Post a Comment